Let's start by downloading the Toolkit: (Preferably one that matches your processor type)
http://www.microsoft.com/downloads/details.aspx?familyid=3bd8561f-77ac-4400-a0c1-fe871c461a89&displaylang=en
Other things to have ready:
Windows 7 Enterprise DVD or ISO (Ultimate will probably work but I haven't tried it).
A simple application DVD/ISO/folder for something like Office or acrobat reader.
A blank CD or a usb flash drive.
Once you have it downloaded, install it and then open the Deployment Workbench. From there go under Information Center, then Components.
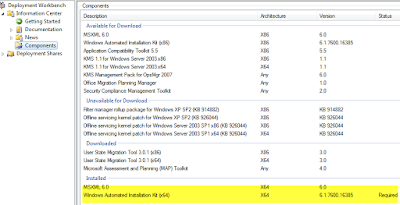 This view will show you what components are already installed on your machine and gives you the option to download and install the rest. For now we need MSXML 6.0 and the WAIK installed. If you don't have them, click on each one and then click on Download (or Queue). The WAIK is over a GB so it may take a while! I know this gloss-over won't do this toolkit justice but feel free to look over the other optional downloads later on. Once you get to the point where both of those show up under 'Installed' then proceed.
If you take a peek under the "Getting Started" tab they've got a diagram which will either enlighten you or give you a migraine depending on your level of familiarity with using Microsoft Deployment tools.
Skip down to the Deployment Shares icon, right click it and choose to create a new Deployment Share. This deployment share is going to be the heart of the whole project. All applications, drivers, OS images, etc will go into subfolders of this folder and all your remote clients will be connecting to it to install from. For now just leave all the default names. Make sure the drive you place this on has at least 10GB for this example project. Now your console should look like this:
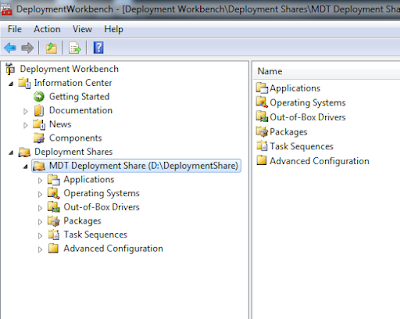
Now right click on Operating Systems and then "Import Operating System". Select "Full set of source files" and then point it to your Windows7 source files location. (DVD, a mounted ISO, folder, etc). Leave the name as is for default and just continue through.
Now right click on Applications and choose "New Application". The first radio button will copy over the whole source. The second will just take a UNC share name and that's what the client will connect to directly. Choose whichever you want for now and hit Next. Provide an application name like Office 2007 or something, then a source folder, and finally a command line. (If you are publishing an office program, try using the customization setup to get nice, silent installs).
Now we need to create a Task Sequence. Give it an ID like 1 or Test1, etc and a name. On the next screen choose "Standard Client Task Sequence". Choose an OS. Product Key is optional at this point. Organization name on the next screen. Default admin password, next. Finish it up.
These tasks are what you'll be prompted with later when you boot off the media that we're going to make.
You can also choose to add in Drivers to be injected at build time. It appears to be pretty much automatic once you add them.
Now right click on your MDT Deployment Share and choose (Update Deployment Share). This will generate new ISO's, etc. You should do this after any major change to make sure it's up to date. Now open Windows Explorer and go to your deployment share folder. Under it you will find a Boot folder which contains ISO's and WIM's for x86 and .64. I'm doing all x64 personally so I'm only using the LiteTouchPE_x64.iso. Burn this ISO to a CD or you can mount it and transfer it to a USB stick.
Quick note on how to do the USB stick method:
run diskpart from a command prompt.
run list disk to find out which one is your usb drive
select disk 1 (or whatever yours is)
clean
create partition primary
select partition 1
active
format fs=fat32
assign
exit
Then copy the contents of the mounted litetouch ISO file to the root of the USB drive.
xcopy :\*.* :\*.* /s /e /f
Now boot a computer off your shiny new image and eventually you'll see the Microsoft Solution Accelerator screen: (in case you're wondering, I'm using Hyper-V which makes capturing these images easier and testing much faster.)
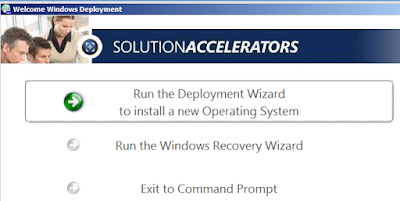
Choose the first option and on the next screen provide a user/pass/domain so that the installation can connect to network shares, etc. Choose the Task we created on the next screen that pops up. Then by default it generates a random computer name, you can rename this as needed. Then you can tell it to auto-join the domain when it's done by providing the missing information in each of the fields. Skip past the USMT screen, choose a language, choose a time zone, check off the application(s) to install (You should see your application listed here).
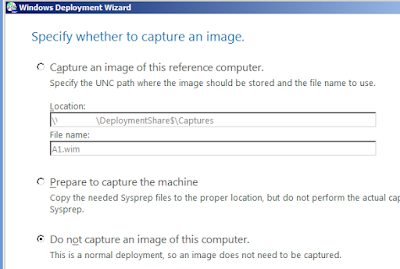
On this next screen you can choose to have it automatically capture a reference image at the end for you. This is useful if you have a WDS server or if you want to import the completed image back into the MDT server later as a new base OS image. If you choose this option it'll automatically run Sysprep, reboot, and upload for you. For now you can just choose not to do it.
 The next screen let's you set up BitLocker! Pretty snazzy.
And then the final screen has a "Begin" button.
Now it'll install the OS for you, then the application(s), and if you went with the capture, then sysprep and capture.

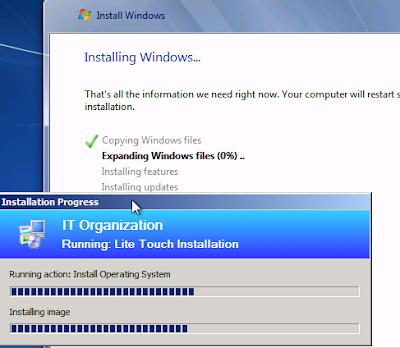
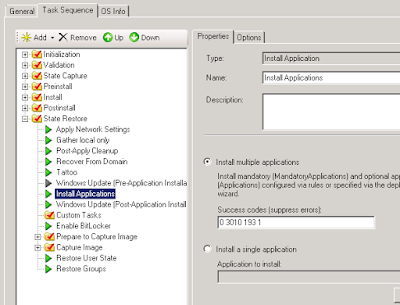
The install will reboot itself as needed, etc. At this point this tutorial is done. If you're feeling confident, I recommend playing around with manually editing Task Sequences to get a feel for just how customizable this system is. You can insert applications, insert reboots, schedule windows updates before and after application installs.


5 comments:
i am trying to deploy windows 7 in many computer labs. everything is ok now; however it is inefficient to keep the application installation user interactive. i could figure out the quiet command for some applications but many others are very difficult to have them install silently . is there a way of silent installation that works with all software ?
Short answer is that there's not a single kill all solution. I mostly use appdeploy.com to figure out the more difficult ones. Sample (under Command Lines) - http://www.appdeploy.com/packages/detail.asp?id=1976
For quick testing, I created a single app install Task in MDT which you just run manually from a virtual machine for quick testing. Just run the litetouch.vbs manually and choose your new task. \\yourservername\deployment$\Scripts\LiteTouch.vbs
I've posted all my silent install syntax and hacks now in a separate article: http://gnawgnu.blogspot.com/2011/07/silent-installs-and-mdt-2010.html
Hi... In many guides, it suggests that you should use MDT2010 to build a reference deploymentshare, and then build a production share afterwards.
I always assumed this was because you could then install applications in the reference deployment, and use the production share as a quicker way to deploy a full system. Is this correct?
For my more standardized images like for training rooms and testing labs, I build a reference image (generally using a VM to keep the drivers clean) and then sysprep/capture the image, add it as an OS in MDT and then set up a custom WIM deploy task for those uses. It's a much faster deployment and good for general use since my current build from scratch runs for 2.5 hours and the WIM deploy of the same runs 45 minutes. I currently just use one share and set up different folders in the Task Sequences for Production, Dev, etc.
Post a Comment